Posted on Friday, 21st June 2013 by Grace Massa Langlois
– the new doughnut craze. There’s been so much hype about pastry chef, Dominique Ansel’s new croissant doughnut creation that it’s inspired me to try and replicate them. The new doughnut is part flaky pastry, and part cream-filled doughnut, how could I resist? Disclaimer, these aren’t your every day typical yeasted doughnuts, they do take some time and patience to prepare but they’re definitely worth every precious moment you invest in the preparations (plus most of the preparation time is resting time).
Not having the secret recipe to follow I had to wing it. From what I’ve read, Dominique said he prepares laminated dough similar to croissant dough but not really (hmm…what does that mean?) and the preparations take three days. He fries the doughnuts in grape seed oil but he doesn’t disclose at what temperature.
Grape seed oil has a moderately high smoke point, I’m wondering if he fries the doughnuts at a very high heat to achieve the height and very distinct separated layers in the interior.
I had an incident with my deep fryer a couple of weeks ago. I was making homemade french fries when all of a sudden the deep-fryer started making very loud noises (actually banging) and before I knew it the lid exploded up in the air and oil went every where. Very scary, thankfully no one was close enough to get injured.
I thought about increasing the temperature of the oil but because I was using a deep sauté pan (fairly shallow) to fry the doughnuts I was a little concerned about the oil boiling over (a little timid after my incident with the deep-fryer). I may attempt a higher heat when the manufacturer returns my deep fryer.
I haven’t had the pleasure of tasting a cronut but apparently Dominique said it should not be mistaken as simply croissant dough that has been fried. Can you believe ? Would you buy one?
Croissant Dough is somewhat similar to puff pastry in that a butter block is incorporated into a base dough and it also goes through a similar lamination process with rolling, turning and folding but the dough really belongs to the family of yeasted dough because yeast is added to help with the rise.
Pasta Sfoglia Brioche {Italian Croissant Dough) is similarly enriched like brioche dough with milk, eggs and butter. I decided to use the Pasta Sfoglia Brioche rather than the basic croissant dough (not typically enriched with eggs) because I thought Dominique may have enriched the dough with eggs because they’re typically used in yeasted doughnuts.
I began my three-day affair by preparing the dough early morning on day one. Croissant dough doesn’t require as many “turns” which is necessary with puff pastry because it’s also leavened with yeast but I didn’t want to take any chances. I performed six turns (rather than my typical four) using the single-fold (letter-fold) technique allowing a good deal of resting time in between turns, one to two hours rather than the typical thirty minutes. After completing the sixth turn I rested the dough in the refrigerator overnight.
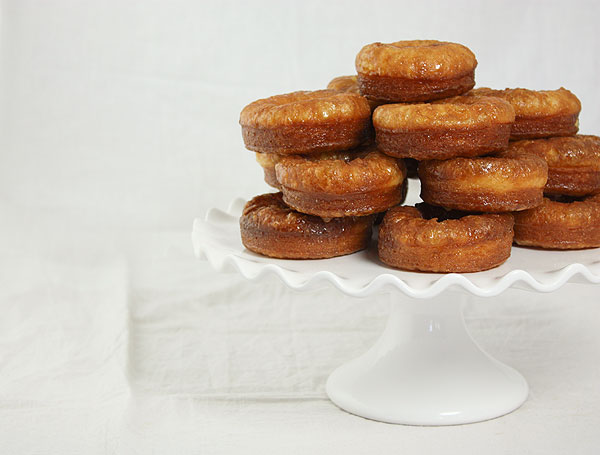
In the morning of day two I removed the dough from the refrigerator, rolled and cut the dough and returned the cut rounds to the refrigerator allowing for another day to rest the dough and develop the flavour.
Day three, finally – deep-frying day. I have to admit I was a little concerned, I wasn’t sure how the dough was going to react when it hit the hot oil, would it expand, did I roll the dough too thin? Watching the reaction was a thing of beauty; the doughnuts started puffing up immediately.
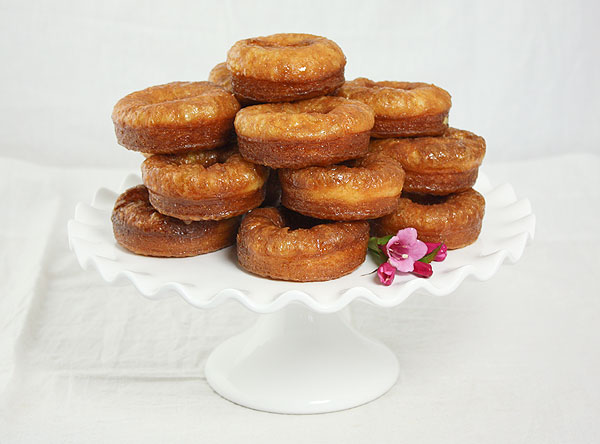
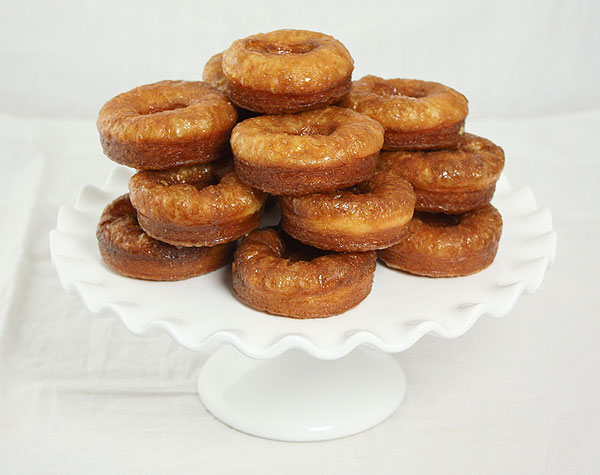
Disappointingly my doughnuts don’t have the same height as the cronut. When I prepare yeasted doughnuts I usually roll out the dough to a thickness of about 13 mm (about ½ inch) but not knowing how the dough would react when it came in contact with the hot oil I decided to roll out the dough thinner (6 mm, ¼ inch). I thought I would achieve the beautiful height because not only is the dough laminated it’s also leavened with yeast.
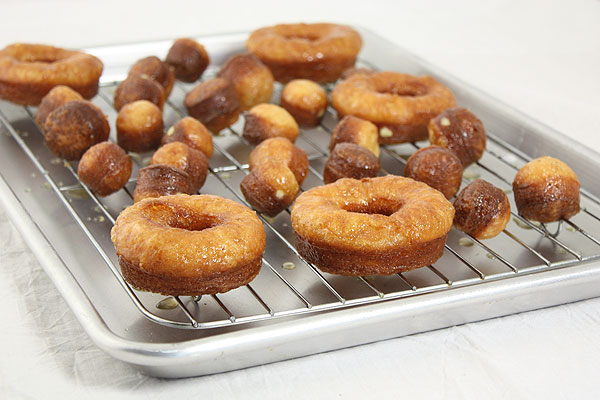
I definitely miscalculated but this is the part I enjoy most about recipe development. I learn so much every time I try something new.
When I prepare these croissant doughnuts in the future I will make a few changes. First change, I’m going to use European butter. Using European butter comes with big advantages, it contains more butter fat than American butter, typically 85%, the acid in the butter tenderizes the dough (which makes it taste better), it helps the dough rise better and the pastry is flakier.
It also contains less water content about 15% compared to 19% in American butter. Lower water content makes the butter more pliable and it also helps prevent the butter from softening too much therefore making it easier to work with especially important when laminating the dough.
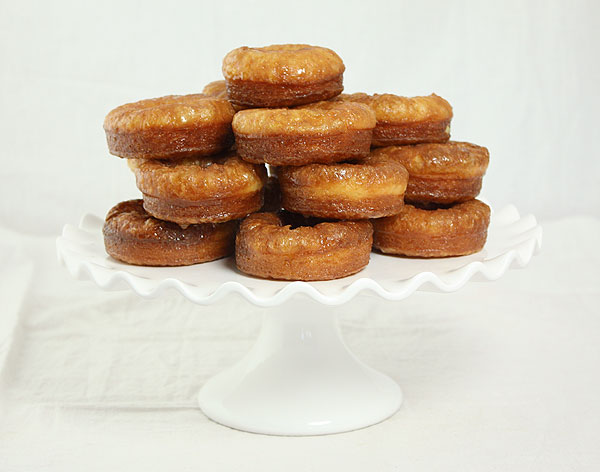
Second change, I’m going to roll out the dough to a thickness of about 13 mm (½ inch). Third change, I’m going to chill the cut rounds in the freezer for about 20 minutes immediately before frying. And last change, I’m going to take Dominique’s lead and use grape seed oil instead of canola oil because of the high smoke point.
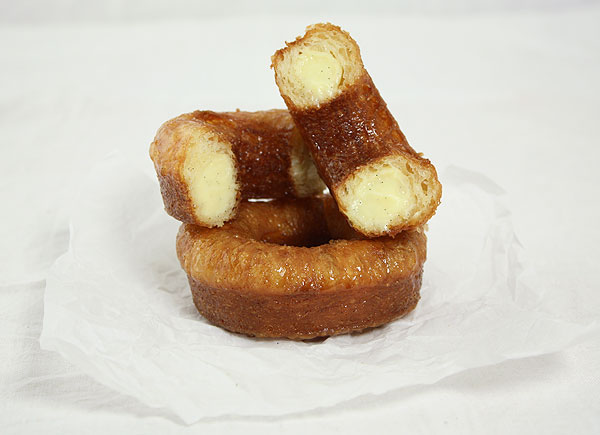
I want to test frying the doughnuts at higher temperatures in hopes that the higher temperature will push and expand the layers of the pastry even higher. It’s difficult to see the interior separated layers in the images because I filled the doughnuts with a good amount of cream (love my pastry cream). Finding the perfect temperature will be tricky because the doughnuts will darken quickly on the exterior, maybe too quickly leaving the interior raw.
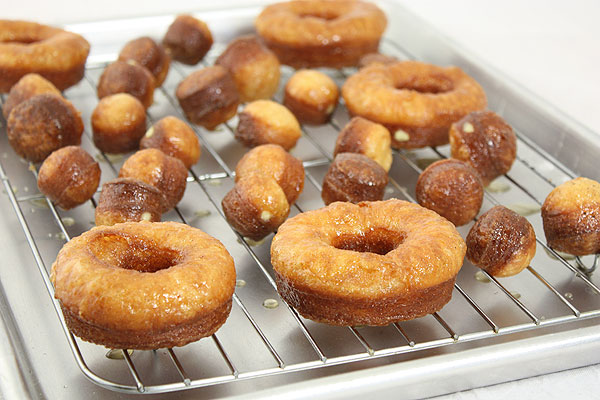
While I didn’t achieve the height of cronuts and I’m not sure if I achieved the flavour I am more than overjoyed with my croissant doughnuts! The exterior is crispy and the interior is so incredibly light and fluffy. What’s the biggest difference between a typical filled doughnut and a filled croissant doughnut? The pastry cream seeps in between all the separated layers so you can enjoy the vanilla bean cream with every glorious honey dipped bite.
Happy Weekend!
Croissant Doughnuts – Honey Dipped and Vanilla Bean Cream Filled
Makes 38 8 cm (3-inch) doughnuts + doughnut holes
- Pasta Sfoglia Brioche – Croissant Dough
- Vanilla Bean Crema Pasticcera {Vanilla Bean Pastry Cream}
- Honey Glaze
Pasta Sfoglia Brioche – Croissant Dough
Makes about 1250 g (2¾ pounds) dough
Pastello {Base Dough}
- 226 g (1¾ cups + 1 tablespoon) Italian “00″ (doppio zero) flour or plain (all-purpose) flour
- 226 g (1¾ cups + 1 tablespoon) bread flour
- 57 g (¼ cup) caster (superfine) sugar, divided
- 1 teaspoon table salt
- Seeds of 1 vanilla bean
- 200 ml (¾ cup + 1½ tablespoons) whole milk, divided
- 8 g (1 packet) active dry yeast
- 2 large eggs, room temperature and lightly beaten with a fork
- 28 g (2 tablespoons) unsalted butter, cut into four equal pieces
- Vegetable oil or canola oil, for deep-frying
- Reserve 2 tablespoons “00″ flour (or all-purpose) and 2 tablespoons bread flour in a small bowl and stir to combine. Reserve 1-teaspoon sugar. In stand mixer fitted with paddle attachment, mix the remaining “00″ flour, the remaining bread flour, the remaining sugar, salt and vanilla seeds at low speed until seeds are evenly distributed.
- Reserve 140 ml (about ½ cup + 1½ tablespoons) milk (keep chilled). To activate the yeast, warm the remaining 60 ml (¼ cup) milk until it reaches temperature between 41 and 43° C (105° and 110° F). Sprinkle the yeast over the milk, stir with a spoon until yeast dissolves. Stir in the reserved 1-teaspoon sugar. Cover with a sheet of plastic wrap and then wrap with kitchen towel and set aside until bubbly and doubled in volume, about 10 minutes.
- Add the activated yeast to the flour mixture and mix on low speed until well combined.
- With mixer running on low speed, gradually add the reserved 140 ml (about ½ cup + 1½ tablespoons) milk.
- Add one-half of the beaten egg yolks and beat on low speed until well combined then add the remaining beaten egg yolks and beat until well combined.
- Remove the paddle attachment and fit the mixer with dough hook. Knead the dough on low speed, 5 minutes.
- Add the butter one-piece at-a-time, making sure each piece is incorporated before adding the next. Continue to knead the dough on low speed until the butter is well incorporated and the dough is smooth, and begins to form a ball that comes away from the sides of the bowl, 5 to 6 minutes. Using dough scraper, transfer the dough to sheet of plastic wrap, shape into a rectangle, wrap and chill in the refrigerator, 1 hour. (The dough should be sticky, but if more dough is sticking to the sides of the bowl than to the ball, add 2 tablespoons of the reserved flour 1 tablespoon at a time. Dust clean work surface with the remaining 2 tablespoons flour, remove dough with dough scraper and transfer to work surface, knead the dough by hand for about 1 minute until it comes together into a smooth ball. Shape ball of dough into a rectangle shape, cover with plastic and chill in the refrigerator, 1 hour.) Prepare panetto (butter block).
Panetto {Butter Block}
Please note, when it came time to cut the doughnuts I rolled out the dough to a thickness of about 6 mm (¼ inch). I was happy with the height of the doughnuts but in future I plan to test rolling out the dough to a thickness of 13 mm (½ inch) to achieve a higher doughnut. I wasn’t sure how much the doughnut was going to expand when it hit the hot oil.
If European butter is readily available I urge you to try it in the Pasta Sfoglia. European butter makes better pastry than American butter. It contains more butter fat (85 percent) (more butter fat flakier pastry), which translates to lower water content. Lower water content makes the butter more pliable and easier to work with especially important when rolling out the pastry. It’s richer than American butter and it has much better flavour. If using European butter you can omit the flour. The flour helps to absorb the water in American butter making the butter more pliable and it also helps the butter from softening too much, in turn it will be easier to work when laminating the pastry (rolling and turning).
- 339 g (1½ cups or 3 sticks) unsalted butter (European preferably), cold
- 16 g (2 tablespoons) plain (all-purpose) flour
- To temper the butter, dust clean work surface with 1 tablespoon flour. Arrange the butter sticks side by side (touching) on the work surface. Dust the surface of the butter sticks with the remaining flour (reserve some flour to dust rolling pin).
- Using lightly floured rolling pin, bang and roll the butter to flatten, incorporating the flour and joining the sticks together. Shape the butter block into an 18 cm (7-inch) square. (If needed, lightly dust the butter block with a little extra flour when rolling and shaping.)
- Wrap the butter block in plastic wrap and chill in the refrigerator, at least 30 minutes.
Pachetto {Dough Package}
- Remove base dough and butter block from refrigerator. Transfer dough to clean, lightly floured work surface. Lightly dust rolling pin with flour and roll dough into a 28 cm (11-inch) square.
- Unwrap butter block and place it diagonally on top of the dough square. Fold one corner of dough in toward the centre and bring the opposite corner of dough in and over so that the corners meet in the middle and overlap. Pinch the edges of the dough with your fingers to seal. Repeat with the other two corners. The butter block should be completely enclosed and edges completely sealed.
- If needed, lightly dust the work surface and the surface of the dough package with flour. (When rolling and folding dough it’s very important to work quickly to prevent butter from softening too much.) Using lightly floured rolling pin, and holding it with one hand on each end, gently tap the surface of the dough, seam side up, to flatten until the square becomes larger and the butter begins to become more pliable. Then, roll the dough (using long movements rather than short back-and-forth movements) to a thickness of 8 mm (1/3 inch). (Lift the dough up off the work surface occasionally and lightly dust work surface to prevent the dough from sticking).
- Using pastry brush, dust off flour from the surface of the dough. Fold the dough using a single-fold (letter fold) method; fold the bottom third of the dough up and over the centre third (pinch edges to seal) and then fold the top third of dough over the centre (pinch edges to seal). One “turn” is complete. (If butter has softened, refrigerate dough for 30 minutes before proceeding).
- Make another turn. Starting from the narrow end, seam side up; roll the dough (using long movements) to a thickness of 8 mm (1/3 inch). Using pastry brush, dust off flour from the surface of the dough and fold the dough using a single-fold (letter fold) method. Using pastry brush, dust off any excess flour on the surface, bottom side and edges of dough. Wrap in plastic, transfer to refrigerator and chill, 2 hours. Two “turns” are complete.
- Remove dough package from fridge and transfer to clean, lightly floured work surface. Lightly dust the surface of the dough and rolling pin with flour. To complete third “turn”, roll dough as described in step 5 and then fold using single-fold (letter fold) method. To complete fourth “turn”, repeat the rolling and folding using the single-fold (letter fold) method. Four “turns” are complete. (Throughout the folding process it’s very important to dust off any excess flour on the dough.) Carefully wrap dough package in plastic and transfer to the refrigerator and chill, 1 hour.
- To complete the final turns, repeat step 6. Six “turns” are complete. Wrap dough package in plastic and transfer to refrigerator and chill, overnight.
- The next morning, line deep roasting tins or rimmed baking sheets (use overturned glasses, strategically placed to prevent plastic from touching the surface of the dough) with nonstick baking paper. To reduce handling of the dough, cut baking paper into thirty-eight 13 cm (5-inch) squares. Arrange twelve paper squares in each roasting tin or rimmed baking sheet. (I cut 19 extra baking paper squares for the doughnut holes placing two holes per paper-square.)
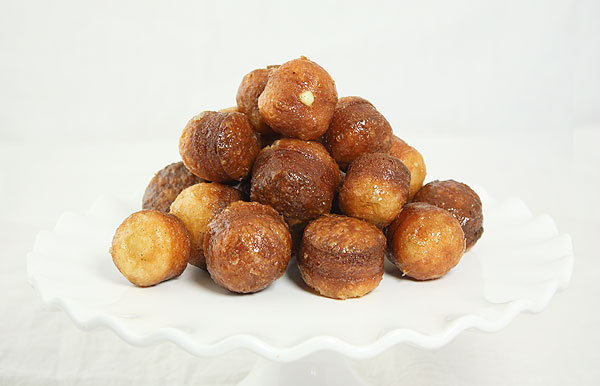
- To cut doughnuts, lightly dust clean work surface with flour. Remove dough from the refrigerator and transfer to work surface. Lightly flour the surface of the dough and rolling pin with flour. Roll out dough into a 48 x 36 cm (19 x 14 inch) rectangle about 6 mm (¼ inch) thick. Using 8 cm (3-inch) doughnut cutter, cut rounds making cuts as close together as possible. (If you don’t have a doughnut cutter, use 8 cm or 3-inch round cookie cutter to cut rounds. To cut doughnut hole, use the base of a large pastry tip with 13mm or ½ inch opening.) Using pastry brush, dust any excess flour off the surface and base of each cut round and place one round on each baking paper square. Cover the tins or baking sheets with plastic and refrigerate to chill, overnight. Arrange doughnut holes (making sure to dust off any excess flour) on rimmed baking sheet lined with nonstick baking paper (I also prepare squares for doughnut holes). Place a few overturned glasses between doughnut holes, cover with plastic and refrigerate to chill, overnight.
- The next morning or afternoon (I fried my doughnuts early afternoon), heat oil in 6 litre/quart heavy-bottomed sauté pan to between 160° and 170° C (320° and 340° F), about 20 minutes. (Check the temperature of the oil frequently during frying to maintain these temperatures. If you have a thermometer attach to the pan to monitor the oil temperature.) Remove pastry cream from refrigerator and whisk until smooth.
- To drain excess oil, layer rimmed baking sheet with 3 to 4 sheets of paper towel. To catch honey drips after dipping doughnuts, place wire rack over another rimmed baking sheet. Have another rimmed baking sheet lined with nonstick baking paper or serving platter ready for prepared doughnuts. Transfer pastry cream to large pastry bag fitted with ½ cm to 1 cm (¼ inch to ½ inch) plain round tip or large bismarck tip.
- To fry, fill and dip doughnuts it is best to work in batches because doughnuts should be filled while still warm (easier to fill). When oil comes to temperature, carefully place 4 to 6 doughnuts (no more than that to ensure even frying) in the hot oil (paper will easily slip away within seconds, use tongs to remove paper). Fry until golden on both sides, 3 to 5 minutes total. Using spider strainer or slotted spoon, remove doughnuts, one at-a-time and transfer to prepared baking sheet to drain excess oil.
- To fill warm doughnuts, use the tip of a sharp paring knife to poke four small holes (evenly spaced) around the base of the doughnut. Insert pastry tip into each hole and pipe the cream until the doughnut feels heavy. (If you’re using a Bismarck tip, it’s not necessary to poke holes, insert tip into the doughnut and pipe.)
- Dip one side of the doughnut in honey and then dip the other side, transfer to wire rack to allow any excess glaze to drip off onto baking sheet.
- Repeat until all doughnuts are fried, filled and dipped.
- Buon Appetito!
Vanilla Bean Crema Pasticcera {Vanilla Bean Pastry Cream}
- 750 ml (3 cups + 3 tablespoons) whole milk, divided
- 1 vanilla bean, split and seeded
- 183 g (¾ cup + 1 tablespoon) caster (superfine) sugar, divided
- 7 large egg yolks, room temperature
- 60 g (¼ cup + 3½ tablespoons) cornstarch, sifted
- Reserve 127 g (½ cup + 1 tablespoon sugar). Reserve 105 ml (¼ cup + 3 tablespoons) milk. In small saucepan, bring the remainder of the milk (645 ml or 2¾ cups), vanilla bean, vanilla seeds and the remaining 56 g (¼ cup) sugar just to the boil over medium heat, small bubbles beginning to form around the sides of the pan, stirring until sugar is dissolved (the sugar will help prevent the milk from scorching and causing a film on the surface of the pan). Remove from heat, cover and allow vanilla to infuse off the heat, 20 minutes.
- Meanwhile, in large bowl, whisk egg yolks and the reserved 127 g (½ cup + 1 tablespoon) sugar until smooth and pale in colour (it’s important to well aerate the egg foam).
- Add the cornstarch, and whisk until smooth. Add the reserved 105 ml (¼ cup + 3 tablespoons) milk and whisk until smooth (absolutely no lumps). Adding a portion of the milk now will reduce lumps from forming.
- Gradually pour the vanilla-infused, warm milk into the egg yolk foam while whisking constantly. Scrape the sides of the bowl with flexible rubber spatula and pour the mixture back into the saucepan. Return to medium heat and cook until thickened, stirring constantly, about 5 minutes.
- Strain the pastry cream through a fine mesh sieve into airtight container; discard vanilla beans (or rinse off and set aside to dry and use for homemade vanilla sugar). Place a sheet of plastic wrap directly on the surface of the pastry cream to prevent a skin from forming as it cools. Cover container and transfer to the refrigerator to chill until completely cooled.
Honey Glaze
- 360 ml (1½ cups) liquid honey
- 60 to 80 ml (¼ to 1/3 cup) water
- Seeds from one-half of 1 vanilla bean + one-half vanilla pod
- In small saucepan, bring honey, 60 ml (¼ cup) water, vanilla seeds and pod just to the boil over medium heat, small bubbles just beginning to form around edges of pan, stirring constantly until honey is melted and vanilla seeds are disbursed. Meanwhile, carefully taste, if the mixture is too sweet and also too thick add the remainder of the water. Remove from heat, cover and let stand off the heat. Rewarm over low heat when ready to use.
You may also enjoy:

Tags: after school treat, afternoon tea, breakfast, breakfast pastries, brunch, croissant dough, croissants, dessert, desserts, desserts for entertaining, donut fillings, donut glaze, donuts, doughnut fillings, doughnut glaze, doughnuts, entertaining, food, food photography, food photos, individual dessert, individual desserts, Italian dessert, Italian desserts, Italian Pastries, Italian pastry, laminated dough, pastry cream, puff pastry
Posted in Baking & Pastry, Baking Mise en Place, Basics, Custards, Creams & Mousses, Dolci Fritti, Fillings, Frostings & Dessert Sauces, Fried Desserts, Pasticcini, Pastries, Pastry Doughs & Batter, Recipes, Ricette di Base, Yeast Breads & Yeast Dough
Comments (5)


June 21st, 2013 at 5:35 pm
Yes please!! These are amazing
June 21st, 2013 at 5:59 pm
WOW! These look complicated!!
I just heard about these
June 21st, 2013 at 7:33 pm
Hi Amy, if you’ve ever made puff pastry you can make these, a little time consuming but really not that hard to do, and definitely worth it!
June 21st, 2013 at 7:33 pm
Thank you!
June 23rd, 2013 at 1:30 am
too much work! I need to pay someone to do this for me.