Posted on Friday, 25th March 2011 by Grace
The sun is shining; it’s a beautiful day! And I finally made these Mini Boston Cream Pies that I’ve been eyeing for months at . A Brooklyn Pastry Chef, , submitted this magnificent dessert recipe.
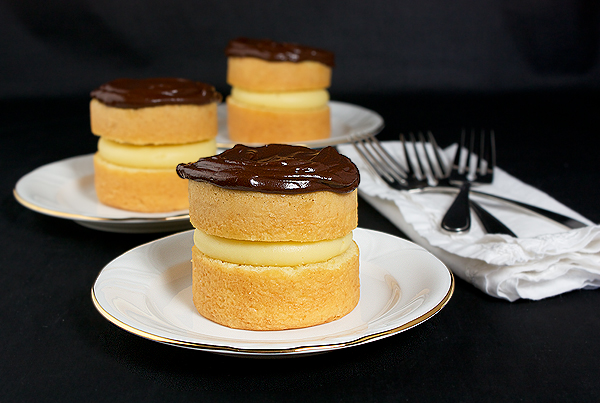
I love to entertain and I am always on the look out for extra special desserts to serve my guests. When I spotted this one I knew I wanted to add it to my collection. Why? Because I enjoy all of the individual elements of the dessert especially the dreamy pastry cream and the decadent chocolate glaze.
But I think it is important to do a test run on the recipe ahead of time. No point in stressing the day of a dinner party wondering if your dessert is going to come together or if it’s going to deliver in flavour.
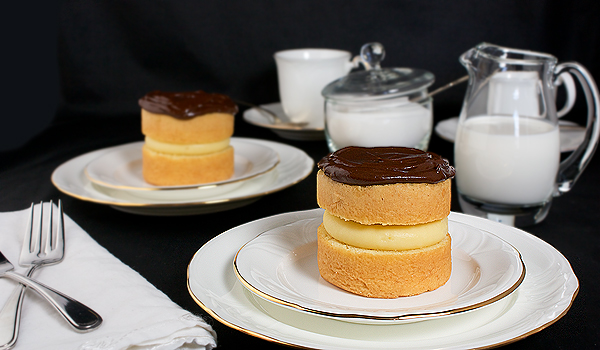
Plus doing a trial run gives you the chance to get the feel for a recipe and also gives you the opportunity to make changes, for example, adding a garnish or reducing the amount of sugar. And most importantly tasting the dessert will help you to choose the perfect complement, perhaps a dessert wine or a specialty coffee.
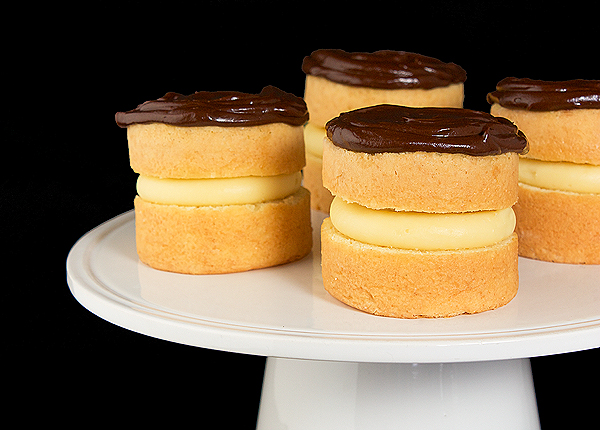
Remember, dessert is the last thing your guests will enjoy, the pièce de résistance. You want the dessert to leave a lasting impression, one they’ll be gushing about the next day at the water cooler. I guarantee you even if you burn the filet and your vegetables were mushy, all will be forgotten when you serve an extraordinary dessert.
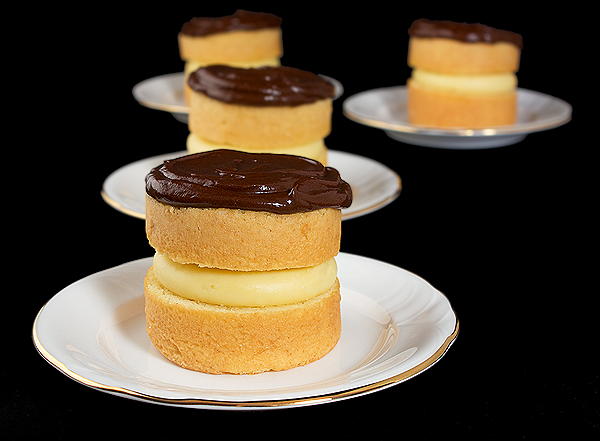
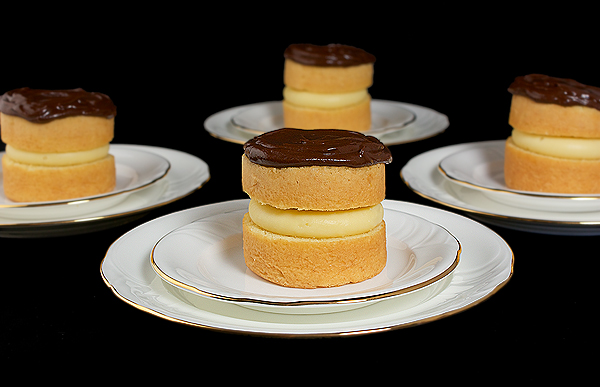
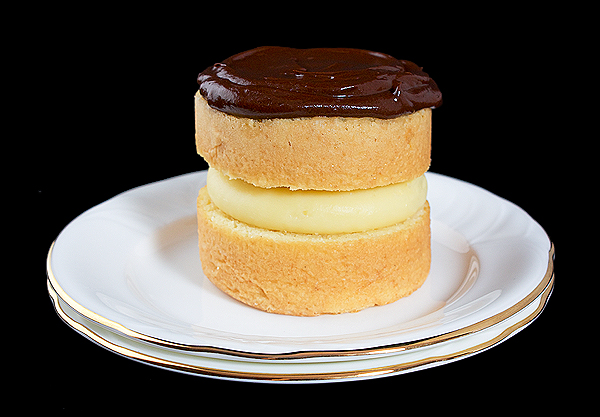
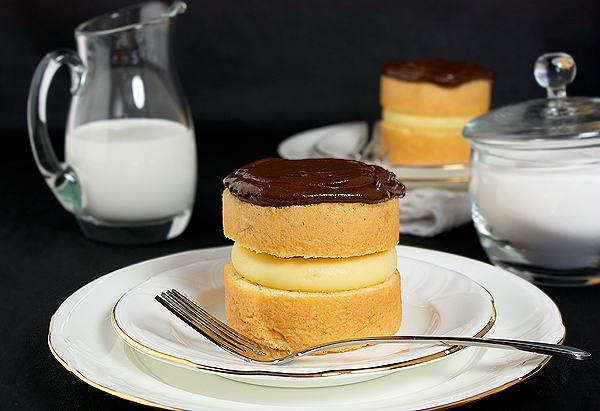
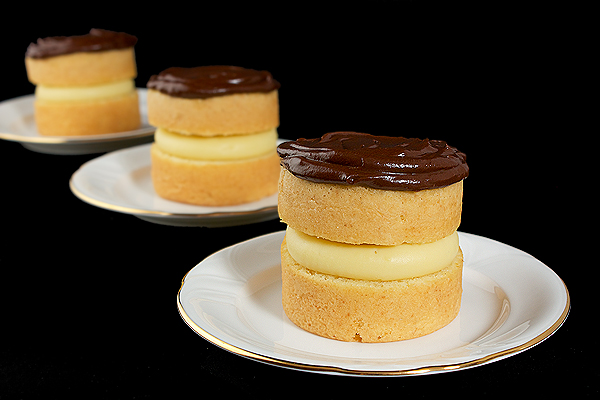
And these Mini Boston Cream Pies are the epitome of a “real show stopper dessert”. The light Vanilla Sponge, velvety custard capped with a luscious chocolate ganache will have your guests praying for another invite. Thank you Penny!
Months ago I shared a more casual version of this dessert, Boston Cream Pie Cupcakes. Who knew it was going to be one of my more popular posts. I realized quickly that I should never have lined those cupcakes with paper liners. Looking back I realize how far I have come in my “Sweet Journey” and also how much I have learned in a very short time.
And I must also share yet another take on this popular dessert, Boston Cream Pie Donuts.
What’s baking in your kitchen this weekend?
Mini Boston Cream Pies
(Recipe from Penny Stankiewicz-Sugar Couture via Design Sponge)
Makes 6 7.62-cm (3-inch) cakes
- Chocolate Glaze
- Pastry Cream
- Vanilla Sponge Cake
**Special Notes – Prepare components of the recipe as listed. The chocolate glaze needs time to set and the pastry cream needs time to cool. If you do not have individual 7.62-cm (3-inch) cake pans you can spread the batter on a 28-cm X 43-cm (11-inch X 17-inch) sheet pan and bake; the rounds can be cut with a cookie cutter or appropriate sized clean can once the cake has cooled completely. This recipe has a few components, it is best to prepare and measure your ingredients before beginning. Also for best results make sure all ingredients are brought to room temperature unless otherwise noted.
Chocolate Glaze
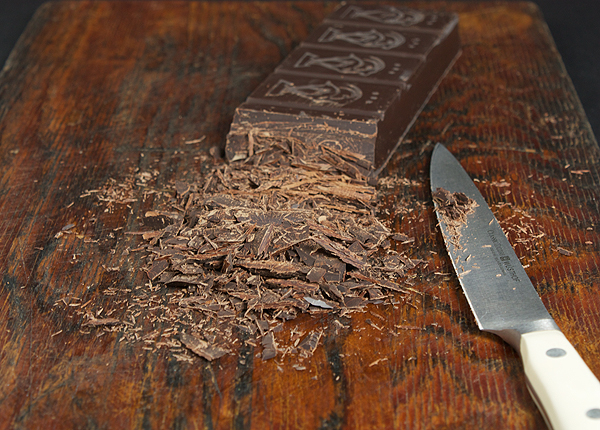
- 151 g (5 ounces) good quality dark chocolate, finely chopped
- 177 ml (6 ounces) heavy cream
- 57 g (2 ounces) unsalted butter, cut into small cubes, softened
- 1 tablespoon corn syrup
- Place the chocolate in a small heatproof bowl.
- In a small-sized saucepan, set over medium heat, bring the heavy cream to a boil. Immediately pour the hot cream over the chocolate. Gently shake the bowl to make sure the chocolate is completely covered with cream. Let sit for 5 minutes.
- Whisk until the chocolate mixture is smooth and glossy.
- Add the butter a couple of cubes at-a-time, whisking well after each addition.
- Add the corn syrup and whisk to well combine.
- Place a piece of plastic wrap directly onto the surface of the chocolate glaze to prevent a skin from forming. Set aside, at room temperature, to cool until ready to assemble the cakes.
Pastry Cream
- 4 tablespoons cornstarch
- 237 ml (1 cup or 8 ounces) whole milk, divided, cold
- 1 large egg
- 1 large egg yolk
- 75 g (1/3 cup) caster (superfine granules) sugar
- ½ vanilla bean, scraped and seeds removed or 2 teaspoons good quality vanilla extract
- 57 g (½ stick or 2 ounces) unsalted butter, cut into small cubes, softened
- In a small-sized bowl dissolve the cornstarch in ½-cup cold milk.
- Add the egg and egg yolk, whisk to combine.
- In a small-sized saucepan, set over medium heat, bring the remainder of the milk and the sugar, and if using the vanilla bean seeds to a boil, whisking to combine.
- Remove from heat and slowly drizzle the hot milk mixture into the egg mixture, whisking constantly. When the egg mixture becomes more comfortable with the hot temperature, add the hot milk more quickly, continue to whisk constantly.
- Return the mixture to the saucepan; cook, over medium heat, whisking constantly until the cream starts to come together. It could take a while but once it starts to come together it will thicken quickly. Cook, whisking constantly until thick and smooth and until one to two large bubbles pop from the cream, making sure to cook out the chalky texture of the cornstarch.
- Remove from heat. Transfer pastry cream to a small-sized clean bowl. Add the butter, a couple of cubes at-a-time, stirring well after each addition. If using vanilla extract add once you’ve stirred in the last of the butter; stir to well combine.
- Place a piece of plastic directly onto the surface of the pastry cream to prevent a skin from forming. Place in the refrigerator to chill.
Vanilla Sponge Cake
- 3 eggs, separated
- 167 g (6 ounces or 1 2/3 cups) cake flour
- 1½ teaspoons baking powder
- ½ teaspoon salt
- 113.40 g (1 stick or 8 tablespoons) unsalted butter
- 118 ml (4 ounces or ½-cup) whole milk
- 225 g (1 cup) caster (superfine granules) sugar, divided
- ½ vanilla bean, scraped and seeds removed or 2 teaspoons good quality vanilla extract
- Preheat oven to 180° c (350° F). Grease individual baking tins or sheet pan with softened butter. Coat with a light dusting of flour.
- Separate the eggs when they are cold; place the whites in one bowl and the yolks in another. Cover with plastic wrap, set aside.
- Using a fine mesh sieve, sift the cake flour, baking powder and salt, holding the sieve nice and high above the bowl to get plenty of air in the flour as it goes down into the bowl, set aside.
- To melt butter, cut the butter into 1.27-cm (½-inch) thick pieces. Place the butter and milk into a microwave safe bowl, cover with a paper towel. Turn the microwave on for 15 to 20 seconds, check to see if butter has melted and stir. Microwave for another 5 to 10 seconds and check and stir again. Continue to do this until the butter has melted and then set aside to cool.
- In the bowl of an electric stand mixer fitted with the whisk attachment on medium speed, whisk the egg whites, gradually streaming in one half of the sugar, one-tablespoon at-a-time. Whisk until stiff peaks form, set aside.
- Using an electric hand mixer beat the egg yolks while slowly streaming in the remaining sugar until the mixture reaches the ribbon stage (When the beaters are lifted, the batter will stream from the beaters forming a ribbon).
- With the mixer on, in a slow steady stream, gradually pour the butter mixture into the egg yolk mixture and beat to combine.
- Add the vanilla seeds (or vanilla extract) and beat to just combine.
- Using a large rubber spatula, in three additions, gently fold in the flour mixture to the egg yolk mixture.
- Using a large spatula, in two additions, gently fold in the egg white mixture until just combined.
- Divide the batter evenly among the prepared baking tins (no more than half-full). If using the sheet pan, evenly spread the batter in the prepared pan.
- Bake until light golden brown and top springs back when touched, 14 to 18 minutes.
- Transfer to a wire rack to cool in tins for 2 to 3 minutes. Remove cakes from tins and return to wire rack to cool completely.
Assembling Mini Boston Cream Pies
- Using a serrated knife cut off any domed tops from the cakes. Cut each cake in half, or alternately cut out 7.62-cm (3-inch) rounds with a cookie cutter or clean can.
- Transfer pastry cream to a large piping bag fitted with a 1.27-cm (½-inch) plain or decorative tip. Working with one cake at-a-time, pipe pastry cream in a spiral on the bottom half of the cake round. If you prefer, you can also forego the pastry bag and spoon and smooth (using back of small spoon or a small offset spatula) the pastry cream on the bottom half of the cake round.
- Top cakes with the top cake rounds.
- Working with one cake at-a-time, using a small offset spatula spread the chocolate glaze on the top round.
- Serve immediately or refrigerate for up to four hours.
- Enjoy!
Related posts:
- Triple Chocolate Mousse Cakes
- Boston Cream Donuts
- Mini Blueberry-White Chocolate Cheesecakes
- Dark Chocolate Cupcakes with Peppermint Marshmallow Cream Filling
- Hot Fudge Sundae Cupcakes
Tags: afternoon tea, cake, cakes, chocolate, chocolate dessert, chocolate frosting, chocolate icing, creme patissiere, dessert, desserts, food, food photography, food photos, frosting, individual dessert, individual desserts, mini cakes, mini desserts, pastry, pastry cream, pudding, small cakes
Posted in Baking & Pastry, Baking Mise en Place, Custards, Creams & Mousses, Eggs, Fillings, Frostings & Dessert Sauces, Pastry Doughs & Batter, Recipes
Comments (41)
 Subscribe
March 25th, 2011 at 2:53 pm
Another beautiful dessert! What kind of baking tins do you use? Your individual desserts always turn out so nice!
March 25th, 2011 at 3:09 pm
Holly cow!!!! I am at a complete loss of words. A-M-A-Z-I-N-G!!!!! Like you said these would be perfect for impressing guests at a dinner party.
March 25th, 2011 at 3:16 pm
Thank you Lauren. For these cakes I used 3 X 3 round baking tins – I purchased from a Canadian supplier but they are available here (they are the smallest ones pictured in the photo) and in fact, I have ordered from this company in the past and the customer service and speed of delivery was wonderful and it was crossing the border too.
March 25th, 2011 at 6:24 pm
These definitely do have the wow factor and would make a great dessert to impress your guests!
March 25th, 2011 at 6:59 pm
So pretty! These would definitely impress any dinner guests!
March 25th, 2011 at 7:11 pm
These are beautiful Grace! Very impressive! I just made Boston Cream Pie Cupcakes, great minds think alike
March 25th, 2011 at 7:25 pm
I noticed that Amanda, I was thinking the same thing. It’s happened to me twice this week.
March 25th, 2011 at 8:12 pm
You have officially won me over with these! YUM!!!
March 25th, 2011 at 9:13 pm
Perfect, as always, Grace. I am so bad about doing any sort of trial run, I never like to do the same recipe twice. But you’re right, these are show-stoppers!
March 25th, 2011 at 10:48 pm
These are beautiful! You take the most wonderful photos. I’ve been looking for a good pastry cream recipe — looking forward to trying yours. Thanks.
March 26th, 2011 at 2:18 am
I love Boston Cream Pie. Your mini pies look amazing
March 26th, 2011 at 8:06 am
WOW! Beautiful!!! I’ve made the cupcakes, but yours certainly top mine
March 26th, 2011 at 2:05 pm
These look absolutely lovely! I agree with you on the test run. Not fun to serve something you’re not happy with or think can be improved!
March 27th, 2011 at 8:37 am
I love Boston cream pie and these are especially gorgeous! Mmmmm! Hope you hit #1 today–just buzzed you.
March 27th, 2011 at 9:27 am
This is a keeper! I want to jump through the screen and eat one. I love all of the individual elements to this cake to but your version looks better than anything I have ever seen. The photography is out of this world too. Can’t wait to make this. Thanks so much for sharing!
March 27th, 2011 at 9:51 am
Wow! What a lovely sight!
March 27th, 2011 at 10:46 am
Growing up my mom loved to make that dessert but from a box. I way prefer fresh homemade dessert. This is gorgeous the way you did it.
March 27th, 2011 at 5:20 pm
These Boston cream pies look so heavenly and decadent! The minis are adorable!
March 27th, 2011 at 7:23 pm
You made them look perfect. How do you get them so perfect with little crumbs? Oh how I am jealous! Check out my blog if you get the chance.
March 27th, 2011 at 7:54 pm
Thank you Gina. Whenever I make sponge cakes I tend to to make a simple syrup, not only does it help to keep the cake moist, add flavour but it also contains the crumbs which helps with presentation. Usually simple syrup is one part sugar to one part water. Place in a small-sized saucepan, bring to a boil and dissolve the sugar. Remove from heat. Let cool. At this point you can also add a liqueur for added flavour, rum, grand marnier or frangelico. I then cut the cakes, using a pastry brush, I brush away the crumbs and then I brush on the simple syrup. Let the cake rest for a bit before filling.
March 27th, 2011 at 9:22 pm
Hi Grace! You mentioned a Canadian supplier for your pans for this lovely creation. I am in Canada and would love to know who that is! Seems I am forever finding great stuff on the ‘net that is either ONLY available in the U.S. or it costs a fortune for us to get it sent up here to the GWN! I have thelittle Molten’n More pans from Chigago Mettalic, but am wondering if the batter would run thru the removable bottoms? Thanks for your wonderful blog & delightful photos!!! Kuchenbaaker
March 27th, 2011 at 9:40 pm
I’ll say these are a show stopper!!! Gorgeous! Boston cream pies are a favorite around here…these would be perfect!
March 27th, 2011 at 10:10 pm
Hi Karin I know all too well your dilemma. My Canadian supplier is Golda’s Kitchen (goldaskitchen dot com). I have ordered from this US supplier (cooksdream dot com/) and they send by the USPS and it is cheaper than UPS. Their prices are reasonable and in some cases works out cheaper than buying here in Canada because we have the benefit of the dollar almost at par. Their customer service is great too and the delivery was pretty quick considering it had to pass customs. Golda’s has a huge selection of baking items from pastry tips to Le Creuset. They are located in and around Toronto. You have to watch the prices because at times their items can be double the cost from the US supplier. I’ve taken the drive to Toronto a few times and loaded up on supplies. By the way I have the same pan, the Chicago metallic and I have made cheesecakes in them without issue, you may want to try that first because I think they would work. The batter is not runny. I would line the bottom and sides with non stick baking paper, fill and bake immediately. Let me know how you make out Karin. Here’s my direct email grace at gracessweetlife dot com if you ever want a list of the other suppliers I’ve purchased from for other cooking and baking needs.
March 28th, 2011 at 11:30 am
i love this dessert it must be very yummmmmmmy….
March 28th, 2011 at 1:22 pm
These are super cute! I love the individual portions you made, just perfect for a dinner party! I hpoe your friends really enjoyed them!
March 28th, 2011 at 1:37 pm
Simple yet elegant. Nice job. Did you use a cake pan or was it a cake ring? This would go great with a Navan Liquor finish.
March 28th, 2011 at 2:53 pm
I used individual small cake pans. And you are right would work beautifully with a Navan finish and also a Navan simple syrup. I didn’t add liqueur because the kids are not crazy about it but would definitely add when serving for a dinner party. A delicious adult twist.
March 28th, 2011 at 6:29 pm
I love the touch of class that these have going. The pictures are gorgeous.
March 30th, 2011 at 11:24 am
One of my favorites that I can’t see to find here in Charleston. At least that taste as well as I remember when I lived in New York!!!
March 30th, 2011 at 11:53 am
These are so much cuter than just making one big ol’ one, then cutting it into slices. Wish I could just dig a fork into one right now.
March 30th, 2011 at 3:21 pm
Those are adorable. I love it.
March 31st, 2011 at 1:06 am
I love anything mini! What a cute dessert! I like the idea of having a whole boston cream pie to myself.
March 31st, 2011 at 1:42 pm
Sinfully yummylicious!
March 31st, 2011 at 2:32 pm
Love mini desserts. Beautiful photography too!
Carmen
April 1st, 2011 at 10:41 am
Love the look of the individual cakes. I run a Tourist Home, and love to have special deserts for my guests to try. Will definitely try this one and hope it turns out as nice as yours. Great photograghy too I might add. Thanks for Sharing!
April 1st, 2011 at 2:07 pm
Absolutely Lovely.
April 19th, 2011 at 7:57 am
awesome photo!
April 19th, 2011 at 12:08 pm
I love Boston Cream Pie. These are perfect—you don’t need to share!
April 20th, 2011 at 5:57 pm
Your cake look great!! I use to made this cake for long times ago and I love it a lots
April 26th, 2011 at 9:14 am
WOW, I love creampies!
nice work!
May 11th, 2011 at 12:50 pm
Oh man, those look absolutely delicious! I need something sweet now.